Please remember to pair the scanner with your computer/laptop/tablet/phone etc. before starting the inventory reconciliation process. Follow the scanner instructions to pair them.
All group members can reconcile the group's inventory.
Laboratories, facilities maintenance areas, and all GT areas in which chemicals are used or stored are required to reconcile chemicals bi-annually (deadlines: June and December). EHS submits the GT Campus Inventory Report to the Board of Regents shortly after (as required by Georgia law). First responders use the GT campus inventory to assess the situation in the case of an emergency.
[collapsed title=Inventory Reconciliation - scanner option]
- Click on “Inventory” icon
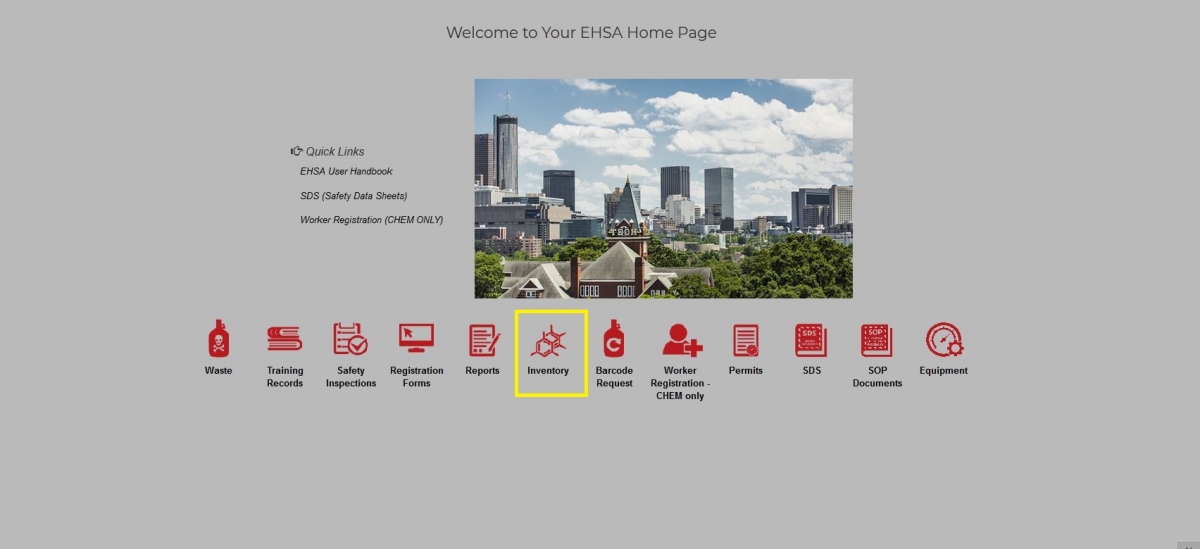
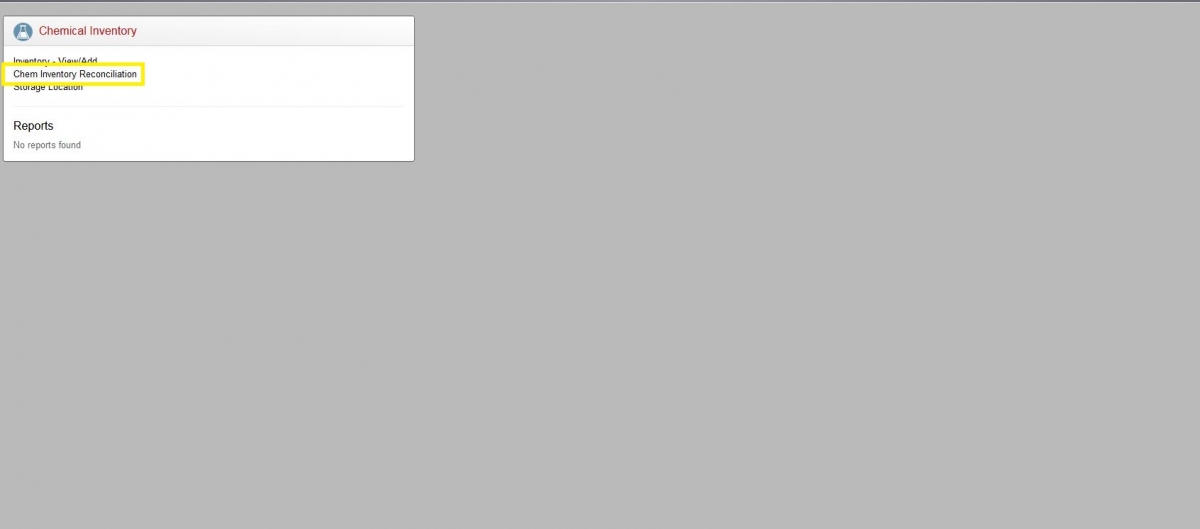
- At the Chemical Inventory box, click on “Chem Inventory Reconciliation”
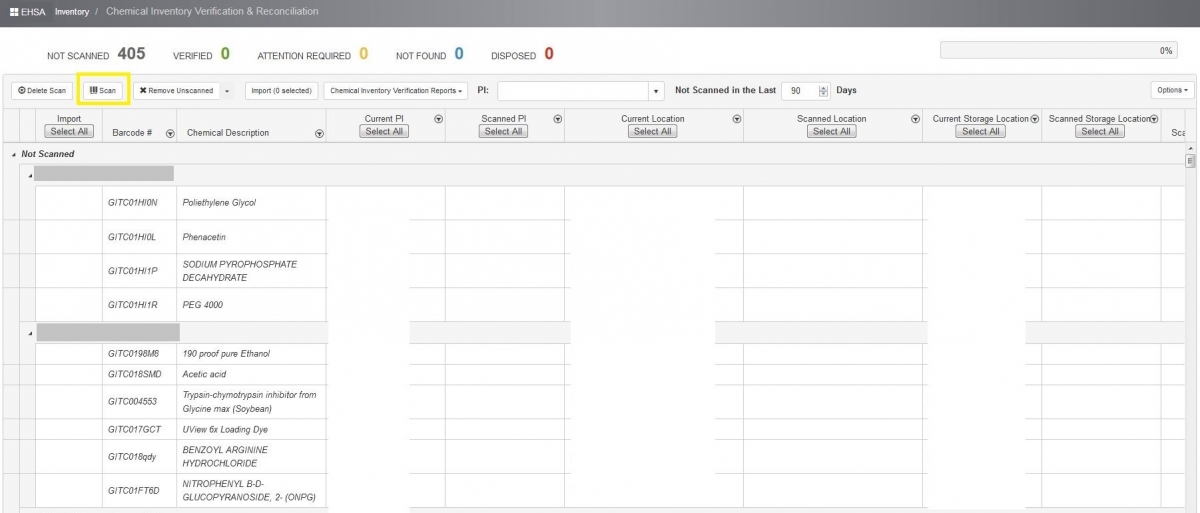
- Click on "Scan" icon (left top corner - second icon from the left), a new screen pops out
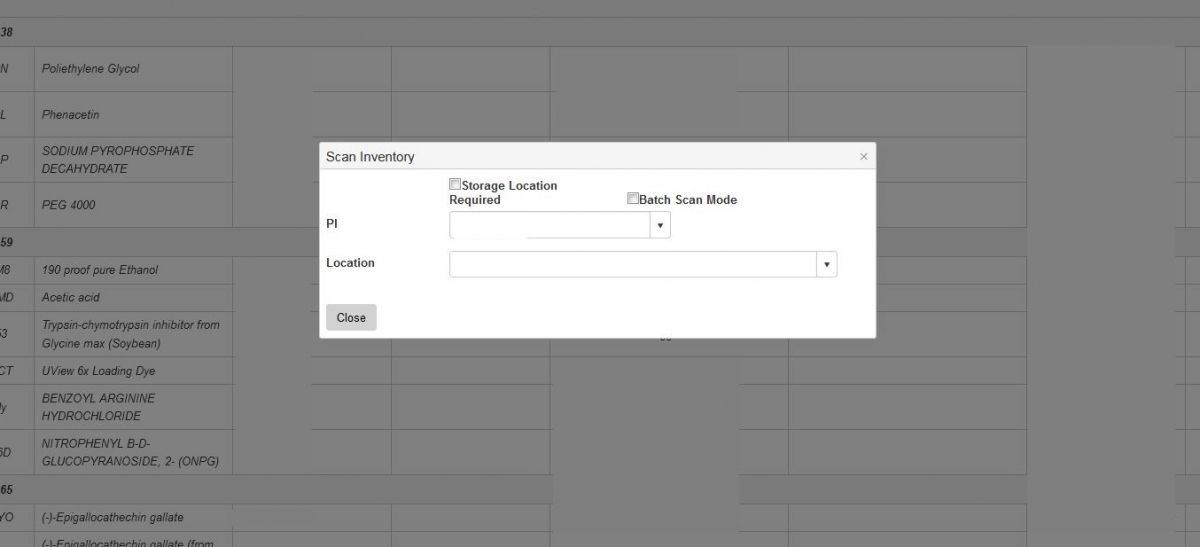
- In "Scan Inventory" box, double-check the PI name and choose the location where you would like to start scanning. If you have storage locations, check the small box next to "Storage Location Required" at the top of your "Scan Inventory" box.
- New field pops out - "Barcode #" - this is a moment when you start scanning your inventory. Each scan should pop out immediately at the background. Continue scanning until you are done.
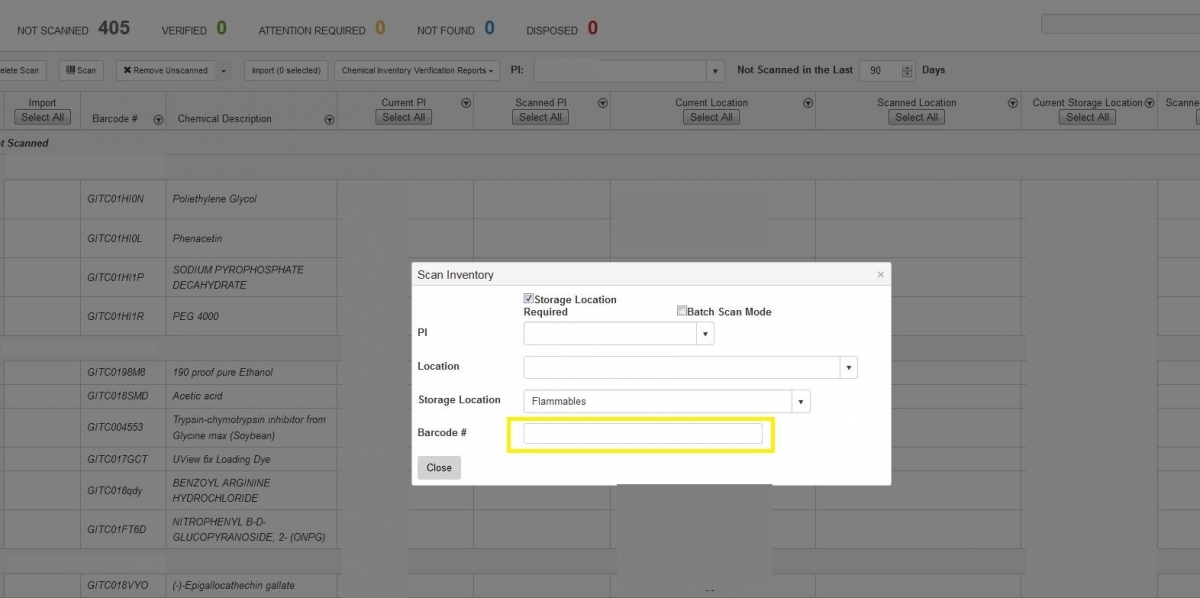
- Counter at the top shows you number of containers already scanned ("Verified") through the process, "Not scanned", "Attention required" and "Disposed". Left top bar shows you % of already scanned inventory.

- When you are done with your location, click on "close"
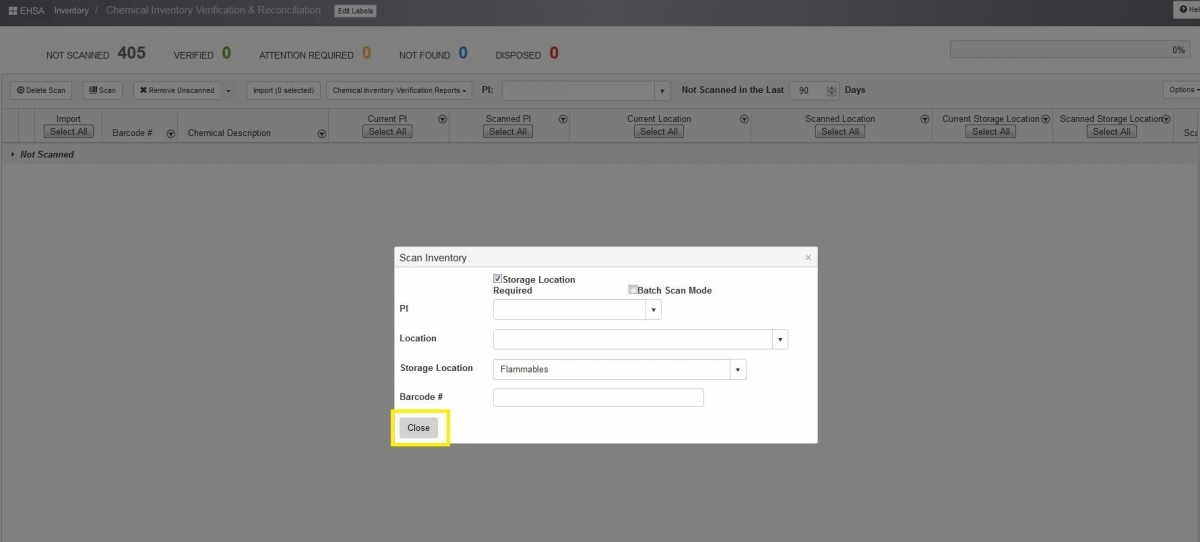
- Table lists all scanned containers. Highlighted chemicals must be taken care of.

- When you are ready to submit your reconciliation report, select your chemicals (first column) and click on "Import". You can do multiple imports during the reconciliation process or import all your inventory at once. Choose the most convenient import option to you.

- After last import, all your top categories should be "0" (zero). Your inventory is reconciled. Reconciliation report is created automatically in the system.

- If you would like to get a reconciliation report, you can download a report file via "Chemical Inventory Verification Reports" (instruction below). There is no need to send your reconciliation report (pdf file) to EHS.
[/collapse]
[collapsed title=Inventory Reconciliation - batch scan mode]
- Click on “Inventory” icon

- At the Chemical Inventory box, click on “Chem Inventory Reconciliation”

- Click on "Scan" icon (left top corner - second icon from the left), a new screen pops out

- In "Scan Inventory" box, double-check the PI name.

- Click on “Batch Scan Mode” (check the small box)
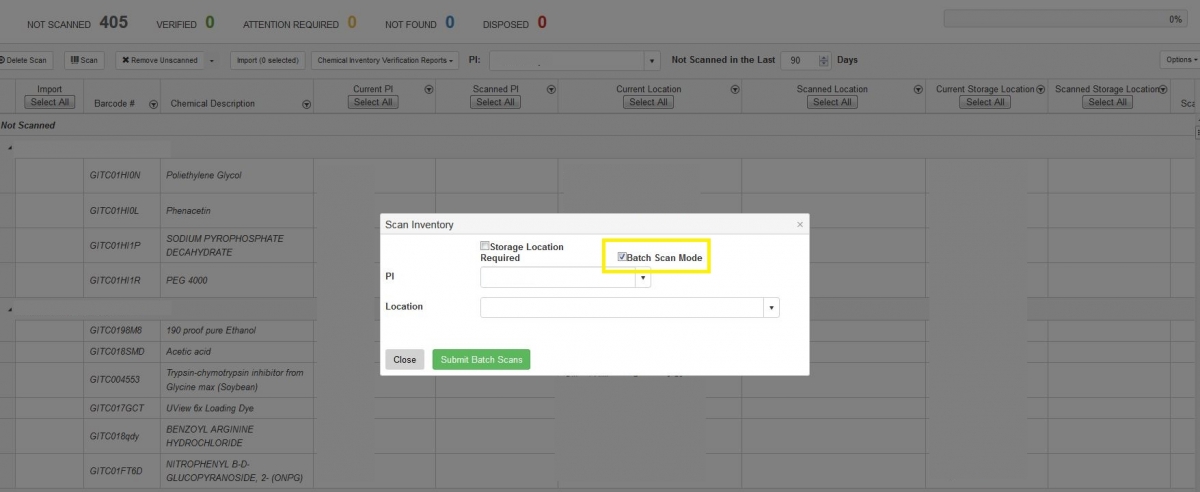
- Select your location and storage location (if needed).
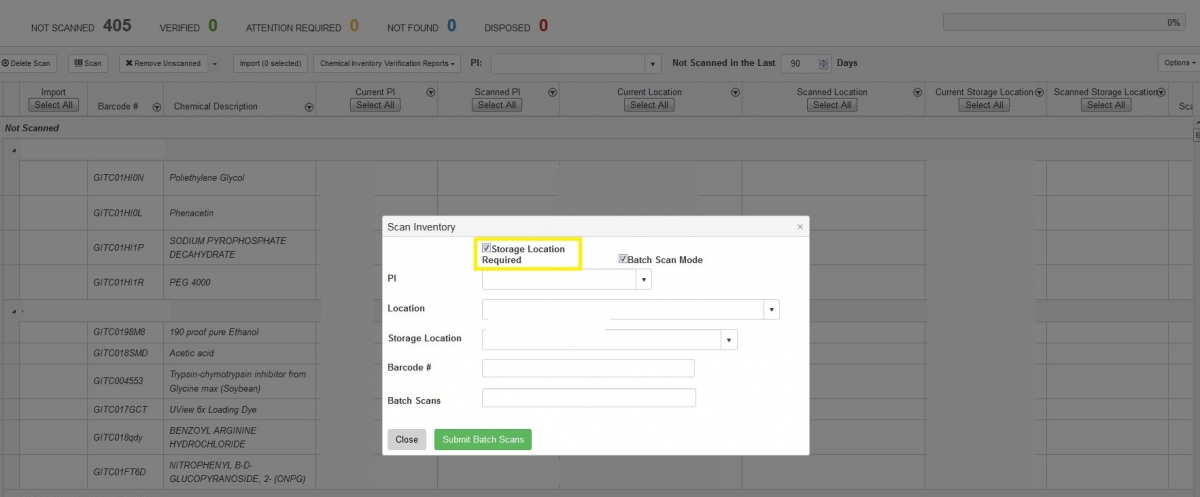
- Click in the barcode number field and scan your first item. As soon as you hear the scanner beep, the scanned barcode drops into the “Batch Scans” field.
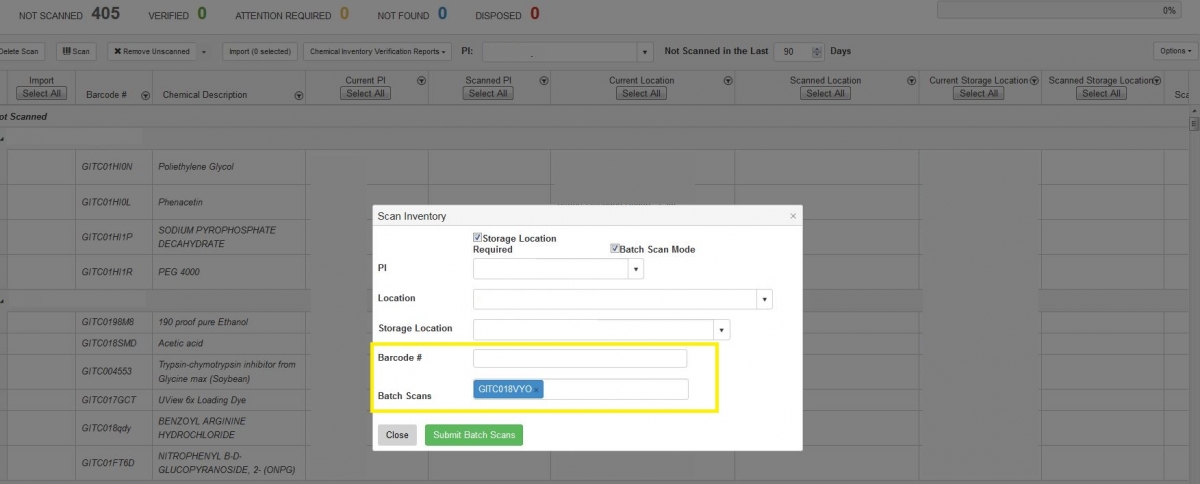
- Continue scanning. With your next scans, you notice your scanned barcodes added to the “Batch Scans” field.
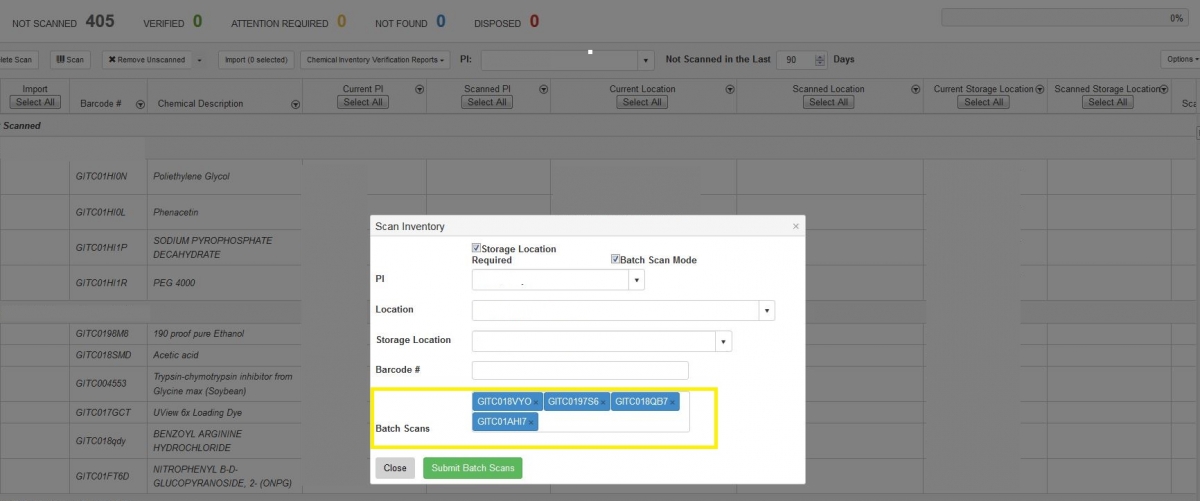
- Once you have scanned some items, click on “Submit Batch Scans” (green button at the bottom) to load the scanned items onto the reconciliation page (your overview reconciliation page, main table). The scan inventory box closes, be aware that after each submission, you would need to repeat steps #3-9 if you need to continue scanning the rest of your inventory (items not scanned yet).
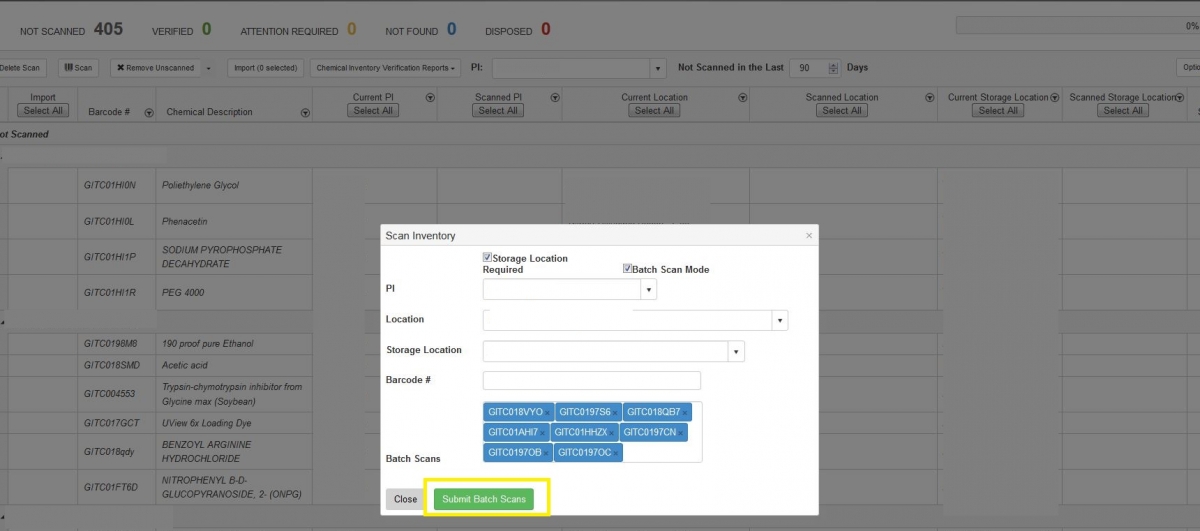
- Counter at the top shows you number of containers already scanned ("Verified") through the process, "Not scanned", "Attention required" and "Disposed". Left top bar shows you % of already scanned inventory.

- It is recommended to submit batch scans a few times rather than just trying to "batch scan" hundreds or even thousand items and then using the "Submit Batch Scans” button at the end of scanning.
- Table lists all scanned containers. Highlighted chemicals must be taken care of.

- When you are ready to submit your reconciliation report, select your chemicals (first column) and click on "Import". You can do multiple imports during the reconciliation process or import all your inventory at once. Choose the most convenient import option to you.

- After last import, all your top categories should be "0" (zero). Your inventory is reconciled. Reconciliation report is created automatically in the system.

- If you would like to get a reconciliation report, you can download a report file via "Chemical Inventory Verification Reports" (instruction below). There is no need to send your reconciliation report (pdf file) to EHS.
[/collapse]
[collapsed title=Inventory Reconciliation - manual option]
- Click on “Inventory” icon

- At the Chemical Inventory box, click on “Chem Inventory Reconciliation”

- Click on "Scan" icon (left top corner - second icon from the left), a new screen pops out

- In "Scan Inventory" box, double-check the PI name and choose the location where you would like to start scanning. If you have storage locations, check the small box next to "Storage Location Required" at the top of your "Scan Inventory" box.

- New field pops out - "Barcode #" - enter manually your barcode. Use the GITCxxxxxx sequence. Click "Enter" after each entry. IMPORTANT: system reads only singles, multiple barcode entries at once do not work (via one "enter" click)
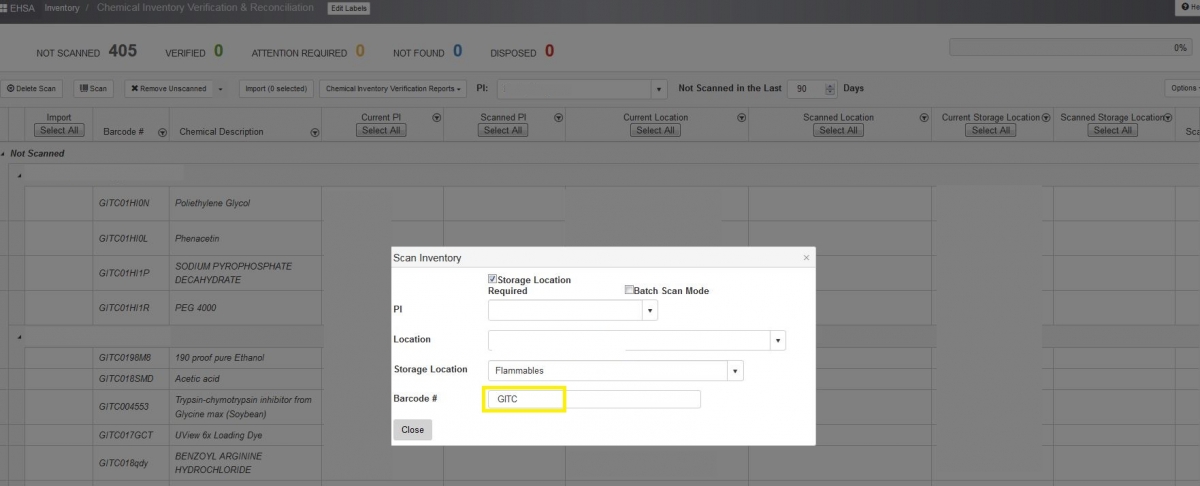
- Counter at the top shows you number of containers already scanned ("Verified") through the process, "Not scanned", "Attention required" and "Disposed". Left top bar shows you % of already scanned inventory.

- When you are done with your location, click on "close"

- Table lists all scanned containers. Highlighted chemicals must be taken care of.

- When you are ready to submit your reconciliation report, select your chemicals (first column) and click on "Import". You can do multiple imports during the reconciliation process or import all your inventory at once. Choose the most convenient import option to you.

- After last import, all your top categories should be "0" (zero). Your inventory is reconciled. Reconciliation report is created automatically in the system.

- If you would like to get a reconciliation report, you can download a report file via "Chemical Inventory Verification Reports" (see below). There is no need to send your reconciliation report (pdf file) to EHS.
[/collapse]
[collapsed title=Reconciliation Report]
- Click on “Inventory” icon

- At the Chemical Inventory box, click on “Chem Inventory Reconciliation”

- Click on "Chemical Inventory Verification Reports" (5th button from left at the top)
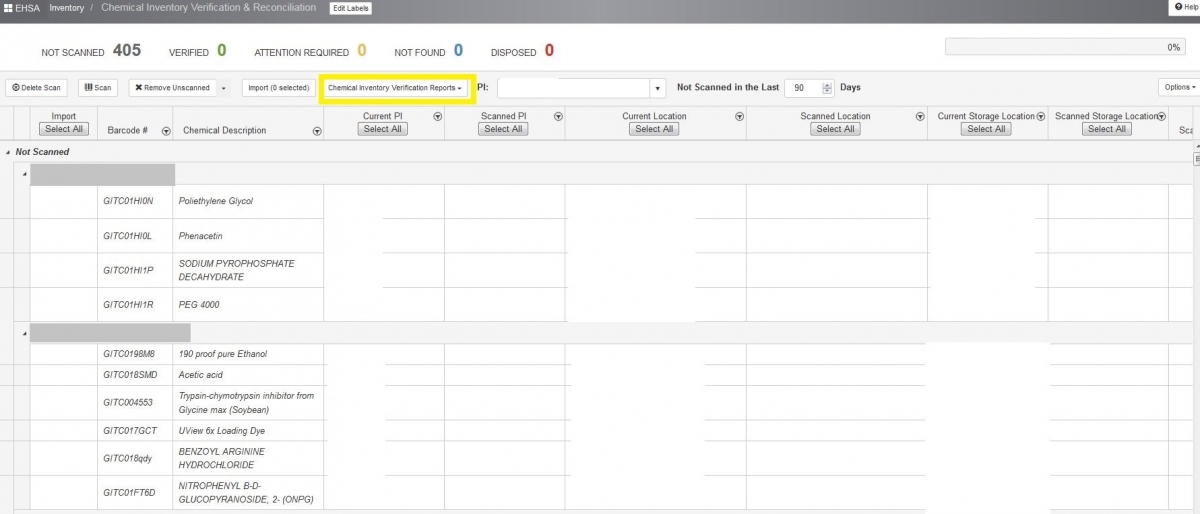
- Choose "Chemical Scan Inventory Listing by Lab"

- A new box pops out ("Report Parameters"). Choose your PI in a field "Type or click to select"
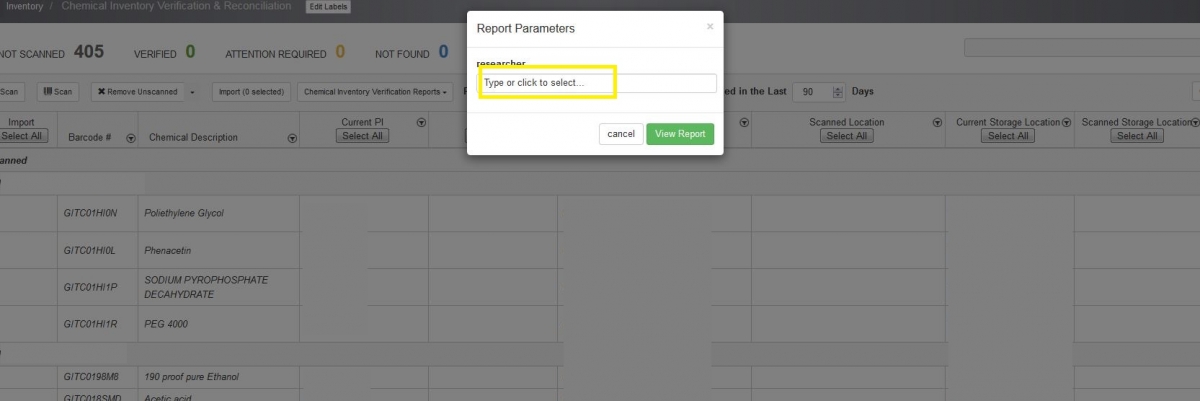
- Click on "View Report"

- New tab opens with your PI Inventory report. If you have pop-ups blocked, please allow browser to open our EHSA tabs.
- Second column on the report lists the last reconciliation date.
[/collapse]
[collapsed title=Managing a Chemical Status - Reconciliation]
Scanned Items:
Attention Required (Yellow Highlight)
These items are probably scanned at the different location than originally entered to the EHSA system or may belong to a different PI. Addressing the Attention Required item is done by updating/correcting a PI, location and/or storage location. To address the issue origin, check where the small check box appears (in which column; PI, location etc.). Below, there is an example of how to address the location issue.
EXAMPLE: Current location means the location where they were entered to the system. Scanned location means a location where the items were scanned (physically scanned at the moment of reconciling your lab).

You can move physically an item to the location where it’s listed in the system (current location) and check the box on the “current location”. If you decide the “scanned location” is the location where this should be, check the box in the scanned location. Remember about importing the updated/corrected item after addressing the item.
Not Found (Blue Highlight)
The Not Found chemicals are not found in your chemical inventory. They might be not entered to the system OR your scanner did not read the barcode properly (partial barcodes due to fast scanning; please give a second for each scan at least), OR your scanner read the vendor barcode (all GT barcode are the 10 digits barcode, starting from “GITC” and followed by a 6 digits unique barcode).

- Highlight the problematic entry and use the “Delete Scan” button.

- Click “Yes” to confirm removing the item.

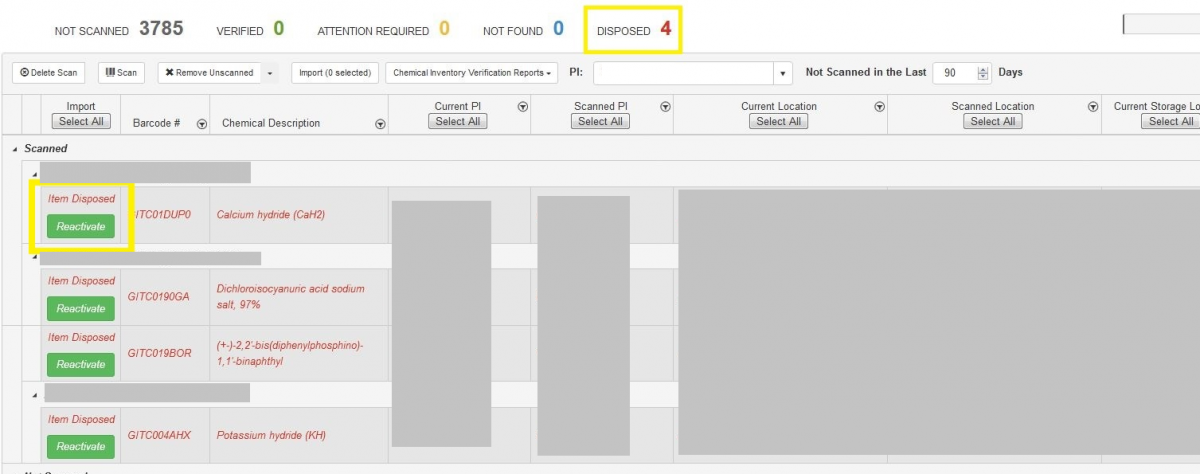
Disposed (Grey Highlight, Red Font)
You can reactivate the found chemicals during scanning, originally marked as disposed. Click “Reactivate” button to reactivate the chemical in your inventory and confirm by clicking “Yes” in a pop up box.
Not Scanned Items
If you scanned all items in the lab and you believe the unscanned items were disposed in the past but your Group inventory was not updated at that time, highlight the unscanned item, click “Remove Unscanned” button. A pop up box appears, choose the reason of removal and click “submit”. You can highlight multiple unscanned items at once. After a pop box appears, a new column “Select for Removal” appears on the left side. Choose items to remove. You will notice the red counter in the “Remove Unscanned Items" box.
NOTE: If you find the disposed chemical in the future, you can reactivate that item in the inventory table (Inventory – “View/Add”, check “Managing a Chemical Status of your Chemical”) or reactivate at next reconciliation (see above the Disposed section). If you still have a problem with reactivating, contact EHS to help you and your Group.
[/collapse]
Chemical Inventory Reconciliation Spring 2022
Chemical inventory reconciliation for Spring 2022 will be due by Wednesday, June 8th at 11:59 PM. By this deadline, all chemical reconciliation must be entered into EHSA.
We will submit the GT campus report to Board of Regents shortly after (as required by Georgia law). First responders use our campus chemical inventory system. The data that those first responders receive is only as good as how accurate the chemical inventory information is. We strongly encourage labs to start submitting the report via EHSA as soon as possible.
If you have any questions or concerns regarding reconciliation, please do not hesitate to reach out to EHS. Please send all inquiries to ehsa@gatech.edu